Digital Marketing Automation | Social Media Scheduling | AI Content Creation | Small Business Growth
What if you could finish an entire month of promotional content before your afternoon coffee gets cold?
Imagine opening your laptop on Monday morning without worrying about what to post on Instagram, which offer to promote on Facebook, or whether your latest digital product has received enough visibility.
Your promotional banners are already designed. Your captions are written. Your publishing dates are organized. Your calls to action direct potential buyers to the right pages.
And the best part? Most of the repetitive work is already scheduled.
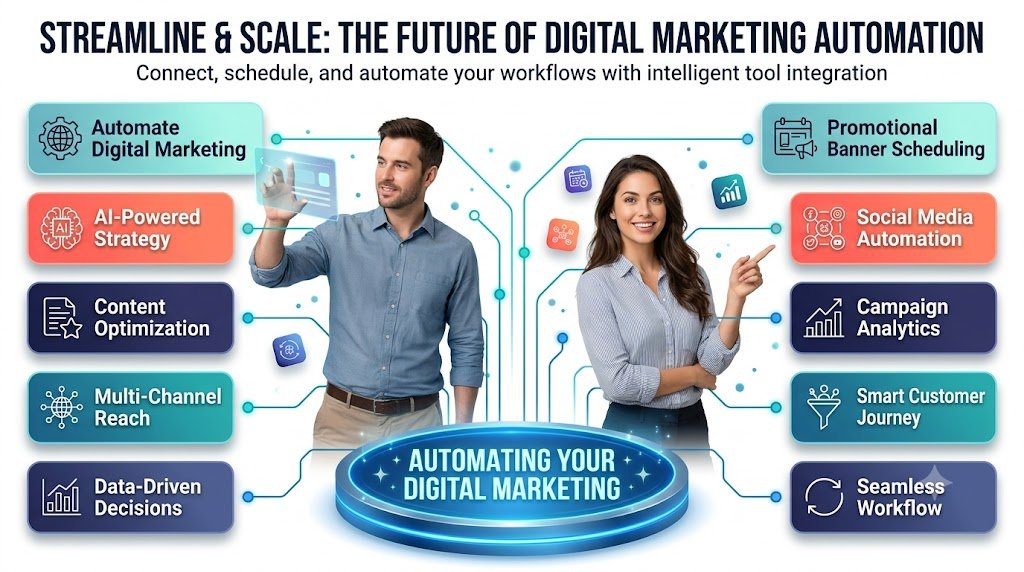
That is the practical advantage of learning how to automate digital marketing through a well-organized promotional banner scheduling system.
Whether you operate an online store, sell digital products, manage a blog, promote affiliate offers, or provide freelance services, marketing consistency matters. Yet creating fresh content every day can quickly consume the time you need for product development, customer support, and business growth.
The solution isn’t to publish more random advertisements. It’s to build a repeatable system that combines thoughtful campaign planning, reusable visual templates, AI-assisted copywriting, and reliable social media automation.
In this guide, you’ll learn how to plan, design, organize, and schedule 30 days of promotional banners in one focused afternoon, with practical examples, a ready-to-use publishing calendar, and strategies for turning social media attention into meaningful business results.
What Is Promotional Banner Scheduling?
Promotional banner scheduling is the process of preparing marketing graphics, captions, links, and publishing dates in advance, then using scheduling software to distribute them automatically across selected digital channels.
Instead of manually creating and publishing every advertisement, you prepare a collection of branded promotional assets and place them into a scheduled content calendar.
For example, a small digital product business might schedule:
- Monday: A banner introducing an eBook.
- Tuesday: A graphic explaining a common customer problem.
- Wednesday: A product demonstration.
- Thursday: A customer testimonial with permission.
- Friday: A promotional bundle offer.
- Saturday: A tutorial or useful checklist.
- Sunday: A community engagement post.
The next week follows a similar structure but introduces different messages, products, and creative angles.
This method makes your marketing predictable without making it repetitive.
Why Automating Digital Marketing Is Worth Your Time
1. Consistency without daily creative pressure
Many business owners understand the importance of posting regularly but struggle to maintain that routine.
A scheduled publishing calendar helps prevent gaps caused by busy workloads, holidays, and unexpected responsibilities.
2. Better control over brand identity
When banners are created in batches, maintaining consistent fonts, colors, layouts, and visual elements becomes easier.
Customers begin recognizing your brand before they even read your business name.
3. More time for revenue-producing activities
Instead of spending time every morning designing social graphics, you can focus on improving product listings, answering buyers’ questions, testing offers, and developing new products.
4. More opportunities to test promotional messages
A complete monthly campaign allows you to compare educational graphics, product benefits, demonstrations, customer stories, and special offers.
Over time, these comparisons can reveal which messages generate useful engagement and qualified visitors.
5. Less dependence on inspiration
Successful marketing requires more than occasional bursts of creativity.
A repeatable system helps you maintain a useful publishing rhythm even when you don’t have an exciting new idea.
The One-Afternoon Marketing Automation System
Here’s a realistic four-hour model for preparing 30 promotional banners. The timing is an illustrative target, not a guarantee. Complex campaigns, unfamiliar software, required approvals, and creating 30 completely original designs may take longer.
Your four-hour production roadmap
Campaign strategy and calendar
30 min
Banner design and batch production
75 min
Captions and conversion copy
45 min
Scheduling and platform setup
60 min
Quality checks and final review
30 min
Total production time 240 minutes
The workflow assumes a defined offer, approved brand assets, reusable templates, and functioning social accounts.
Step 1: Define Your Marketing Goal Before Designing Anything
One of the biggest mistakes in automated marketing is creating attractive graphics without deciding what those graphics should accomplish.
Start with one primary business objective.
For example, your objective might be to increase downloads of a free resource, generate qualified traffic to a product page, increase email subscribers, or produce sales for an existing digital product.
Consider an online entrepreneur selling business spreadsheet templates.
Instead of posting generic messages such as “Check Out Our Products,” the entrepreneur could organize the month around a specific promise:
“Spend less time managing your business numbers with ready-to-use spreadsheets.”
That promise provides a consistent direction for educational content, product demonstrations, promotional banners, and customer engagement.
Before proceeding, identify your intended audience, your featured product, the problem it solves, its most important benefits, and the action you want viewers to take.
Step 2: Create Five Reusable Promotional Banner Templates
You do not need 30 completely different designs to create an effective 30-day campaign.
A more efficient approach is to build five reusable template categories.

Product spotlight banner
Introduce a specific product with its name, main benefit, and a clear buying or discovery action.

Educational value banner
Share a helpful tip, shortcut, common mistake, or useful process connected to the product.

Trust and credibility banner
Display authentic customer feedback, a documented result, or a transparent product demonstration.

Special offer banner
Announce a genuine discount, product bundle, bonus, or limited promotion with accurate conditions.

Engagement and conversation banner
Ask a relevant question, invite a response, or encourage your audience to share a challenge.
Using five foundational layouts, you can produce six thoughtful variations of each template, resulting in 30 campaign graphics.
Tools such as Canva, Adobe Express, or Figma can help organize reusable designs. Availability of specific batch-creation features depends on your chosen tool and plan.
What makes a promotional banner effective?
A high-quality promotional banner should communicate its essential message within seconds.
Use a concise headline, one dominant visual idea, readable typography, strong contrast, and a recognizable brand identity.
The banner should also make sense on a mobile phone. A design that looks impressive on a large desktop monitor may become difficult to understand when reduced to a small social media feed preview.
Where possible, avoid placing several competing offers or multiple calls to action inside one graphic.
A useful design principle: one banner, one main message, one next action.
Step 3: Use AI to Generate 30 Banner Headlines and Captions
AI-assisted copywriting can dramatically reduce the time spent drafting promotional content.
However, the best results come from providing specific context rather than asking an AI tool to generate generic advertisements.
Give it information about your audience, products, brand personality, unique benefits, and desired action.
Here is a reusable prompt for preparing an entire month of banner copy:
AI prompt: 30-day promotional content generator Copy
Act as an experienced digital marketing strategist and conversion copywriter. Create a 30-day promotional banner content calendar for a business selling [PRODUCT] to [TARGET AUDIENCE]. Include a unique headline, supporting message, caption, CTA, visual concept, and landing-page objective for each day. Balance education, genuine benefits, demonstrations, engagement, and relevant promotional offers. Avoid repetitive language, fabricated testimonials, unsupported promises, and artificial urgency.
Use the generated output as a working draft. Review product claims, prices, links, offers, spelling, and audience relevance before publication.
AI can accelerate writing, but your knowledge of your customers is what makes the content genuinely useful.
Step 4: Build a 30-Day Promotional Banner Calendar
A well-designed content calendar prevents your social media accounts from becoming a continuous stream of sales advertisements.
The strongest approach is to rotate between product discovery, useful advice, demonstrations, trust-building, audience engagement, and purchasing opportunities.
Here is a sample 30-day calendar for a business selling downloadable templates, eBooks, digital planners, or educational resources.
30-day promotional calendarSelect a campaign week to view its daily banners.
30 posts
Week 1Week 2Week 3Week 4Bonus days
Introduce and educate
| Day | Banner headline | Purpose |
| 1 | Meet Your Smarter Workflow | Brand introduction |
| 2 | The Problem With Manual Work | Pain point |
| 3 | One Tool, Less Daily Friction | Product benefit |
| 4 | A Simple Productivity Tip | Educational |
| 5 | See the Template in Action | Demonstration |
| 6 | What’s Your Biggest Challenge? | Engagement |
| 7 | Explore the Starter Collection | Soft promotion |
Copy all 30 banner ideas
This content distribution helps new audiences discover your brand while giving existing followers a reason to remain engaged.
It also supports different stages of the buying journey.
A visitor who isn’t ready to purchase on Day 2 may become interested after seeing a demonstration on Day 10, a practical tutorial on Day 18, and a relevant product comparison on Day 25.
Not everyone buys immediately. A sustainable digital marketing system accommodates that reality.
Step 5: Produce 30 Banners Using Batch Design
Once your calendar and copy are prepared, it’s time to turn those concepts into visual content.
Batch design means completing similar tasks together rather than constantly switching between writing, designing, exporting, and scheduling.
Open your chosen design tool and create a master project containing the five reusable layouts.
For every variation, replace the headline, supporting text, imagery, product mockup, and CTA while keeping the underlying visual identity consistent.
Choose the right dimensions
Different publishing surfaces require different image shapes. These are useful starting points, subject to each platform’s current requirements.
| Marketing placement | Suggested starting size |
|---|---|
| Instagram square posts | 1080 × 1080 px |
| Portrait feed graphics | 1080 × 1350 px |
| Stories and vertical promotions | 1080 × 1920 px |
| Pinterest vertical graphics | 1000 × 1500 px |
| Blog and website banners | 1280 × 720 px |
Do not assume every network displays images identically. Test important text placement, safe areas, cropping, and accessibility before scheduling.
If you’re promoting your blog through Google Discover, relevant featured images at least 1200 pixels wide are a useful technical consideration, but they do not guarantee Discover distribution.
Google for Developers
Organize files before exporting
Name your graphics consistently:
Day-01-Brand-Introduction.png
Day-02-Customer-Problem.png
Day-03-Product-Benefit.png
Continue the same naming structure for all 30 days.
Organized filenames make it easier to find assets, replace a banner, or review the correct design before publication.
Save your master templates
The real value of batch production becomes obvious in the second month.
Instead of rebuilding every graphic, you can reuse the original layouts with updated product information, messaging, and visual elements.
Your first monthly campaign becomes the foundation for a repeatable content creation process.
Step 6: Choose the Right Social Media Automation Tools
The best social media scheduling platform isn’t necessarily the one with the most features.
It’s the one that supports the channels you actually use, lets you preview your posts, and fits your workflow and budget.

Buffer
Suitable for creators and small businesses managing several social accounts. It offers channel-specific customization and bulk CSV uploads. Current documentation describes a 10-post per-channel queue limit on its free plan and up to 100 posts per channel per bulk upload on paid plans.
Scheduling posts
+1

Meta Business Suite
A practical starting point for businesses primarily managing Facebook and Instagram content through Meta’s own tools.

Later
Worth evaluating for visually oriented content calendars and businesses focused on graphics, product photography, and creator marketing.

Hootsuite
An option for organizations that need broader team workflows, account oversight, and social media management features.
Before committing to a tool, check its latest supported networks, pricing, scheduling limits, account permissions, and media-format restrictions.
Some platforms or content formats may require additional publishing steps or manual confirmation.
Step 7: Schedule Your Entire Campaign
With 30 completed designs and their corresponding captions, you can begin loading the calendar.
For an ordinary scheduler, the basic procedure is straightforward:
- Connect the business social media profiles using the platform’s supported authorization process.
- Set the appropriate account timezone and preferred publishing schedule.
- Upload each banner and paste its approved caption.
- Attach the correct product, landing-page, or article URL where links are supported.
- Assign each post to its intended date and time.
- Review every preview before confirming the queue.
For larger campaigns, check whether bulk uploading is available.
For example, Buffer’s bulk upload documentation explains how to prepare a channel-specific CSV template, including scheduled times and supported media references. Its documented timestamp format is YYYY-MM-DD HH:mm.
Help Center
A useful working spreadsheet can contain columns for publish date, platform, banner filename, caption, CTA, destination URL, campaign category, approval status, and scheduled status.
Avoid publishing identical content everywhere
Social media automation should not mean distributing exactly the same message to every platform without considering the audience.
A promotional banner may work well on Instagram but need a different caption for LinkedIn.
A Pinterest graphic may benefit from a more descriptive search-oriented title, while a Facebook post may invite a genuine conversation.
Start with one core marketing message, then adapt its presentation for each channel.
Step 8: Turn Promotional Banners Into Actual Buying Opportunities
One of the most important distinctions in modern digital marketing is the difference between collecting attention and creating business value.
A banner might generate likes and impressions without producing a single qualified website visit.
To improve the commercial effectiveness of your content, connect each promotional post with a relevant next step.
The three-part banner conversion formula
1. THE HOOK
“Still spending hours organizing your business expenses?”Identify a recognizable problem.
2. THE VALUE
“Simplify your monthly tracking with an editable spreadsheet.”Explain a useful benefit without exaggerating.
3. THE ACTION
“Preview the template before you buy.”Offer a low-friction next step.
This approach works because the banner addresses a real need rather than simply demanding a purchase.
Match the CTA to the customer’s readiness
Different audiences need different invitations.
Someone discovering your brand for the first time may respond better to “Explore the Free Guide” than “Buy Now.”
An existing subscriber who has already reviewed your product may be ready for “View the Complete Bundle.”
A customer who has purchased one resource might appreciate “Discover Related Templates.”
Effective promotional banner scheduling therefore requires more than placing product advertisements on a calendar. It requires understanding why someone would click.
Make sure the landing page delivers
Never send traffic to an unrelated home page when a more specific destination exists.
For example, a banner promising a preview of a monthly budget tracker should lead directly to that tracker or its relevant demonstration.
The destination should load comfortably on mobile, clearly explain the offer, show accurate pricing, answer common buying questions, and provide a straightforward next step.
Step 9: Build a System That Converts First-Time Visitors Into Returning Customers
Most businesses spend considerable effort attracting new audiences but pay less attention to encouraging people to return.
Your 30-day promotional system should include both acquisition content and retention content.
Give first-time visitors a reason to stay
Offer a helpful resource related to the audience’s immediate problem.
For a digital product store, this might be a free productivity checklist, a sample planning sheet, or a short tutorial.
The resource should be useful on its own, not merely an advertisement disguised as a free download.
Create a natural follow-up journey
If someone subscribes to receive your resource, a permission-based email sequence can deepen the relationship.
A simple sequence might introduce the free resource, explain how to use it, share a related educational example, and eventually present a relevant paid product.
Offer value before asking for a purchase.
Encourage customers to return for new resources
Returning buyers often appreciate consistency and relevance more than constant discounting.
Promote useful product updates, new tutorials, complementary resources, and appropriately targeted bundles.
You can also create a recurring content feature such as:
“The Weekly Digital Business Shortcut”
Every week, publish one practical technique your audience can try immediately.
This gives readers a clear reason to revisit your website or subscribe to future updates.
Step 10: Review Your Marketing Results Without Becoming Obsessed With Vanity Metrics
Once your automated campaign begins publishing, the work is not completely finished.
You still need to respond to comments, monitor delivery errors, evaluate results, and make adjustments when necessary.
Focus on metrics that connect your content to business objectives.
| Metric | What it helps explain |
|---|---|
| Reach and impressions | How widely a post was distributed |
| Link clicks | Whether people took the intended action |
| Click-through rate | The proportion of impressions generating clicks |
| Landing-page conversion rate | How effectively the destination converts visitors |
| Email sign-ups | Whether the campaign attracts potential future customers |
| Sales and revenue | Whether promotional activity contributes to purchases |
| Returning visitors | Whether people come back after discovering your brand |
Use tracked campaign links where supported, maintain accurate analytics settings, and review trends across several posts rather than making decisions from a single day’s results.
An illustrative conversion example
Suppose a monthly campaign produces 1,500 visits to a product page and 30 purchases.
Campaign performance calculatorVisitorsPurchasesPrice ($)
Conversion rate
2.00%
Gross sales
$570
Illustrative arithmetic, not a predicted result. Gross sales exclude fees, advertising, taxes, refunds, and other costs.
The conversion rate tells you more about the buying journey than impressions alone.
If visitors are reaching your site but not purchasing, investigate whether the audience is qualified, the offer is clear, the page works well on mobile, and the product matches the promotional promise.
Common Mistakes That Weaken Automated Promotional Campaigns
Automating without a strategy
Thirty scheduled posts will not create strong marketing if the content has no clear audience or objective.
Using the same design and message repeatedly
Visual consistency is helpful. Exact repetition can become boring and reduce the value of your content.
Promoting products too aggressively
An account that only publishes “Buy Now” messages gives non-buyers little reason to continue following it.
Publishing artificial testimonials
Never use invented customer reviews, fabricated results, or misleading social proof to make an offer appear more credible.
Forgetting expired promotions
A campaign scheduled weeks in advance may contain offers that later become unavailable.
Always check validity dates and update or cancel affected posts.
Ignoring followers after scheduling
Automation reduces repetitive publishing work. It does not replace customer conversations, community moderation, or relationship-building.
Failing to check whether posts published
Disconnected accounts, expired permissions, media errors, and platform restrictions can prevent scheduled content from appearing.
Review your publishing queue regularly.
How to Improve Your Promotional Content for Search and AI Discovery
Your monthly banner system can do more than maintain an active social media presence.
With appropriate planning, it can also support your broader content marketing strategy.
For example, a banner explaining an important digital marketing technique can direct interested readers to a comprehensive blog article.
That article can answer their questions, introduce related resources, and provide a relevant product recommendation when appropriate.
This creates a connected journey from social media discovery to useful website content and, potentially, a commercial action.
Write articles around genuine customer questions
Consider questions such as “How can small businesses schedule social media posts?”, “Can AI help design promotional banners?”, or “What is the best way to automate social media marketing?”
Address these questions directly with clear explanations, practical examples, and meaningful recommendations.
For AI-powered discovery experiences, make important concepts easy to identify through descriptive headings, concise definitions, and well-organized information.
These practices improve usefulness and machine readability, but no format guarantees inclusion in AI-generated answers.
Create a strong featured image
Use an original, representative featured image that accurately communicates the article’s subject.
For Google Discover eligibility and presentation, Google recommends compelling images at least 1200 pixels wide, relevant image metadata, and allowing large image previews.
Google for Developers
A visually attractive article header may help earn attention, but it should never promise something the article does not deliver.
Connect related resources
An article about promotional banner scheduling might naturally link to a guide on creating social media graphics, a tutorial about writing effective marketing captions, or an explanation of landing-page conversion optimization.
These connections help readers continue learning instead of leaving your website after viewing one page.
Maintain accuracy and freshness
Review instructions whenever social media platforms update their publishing tools or account requirements.
Google’s people-first content guidance emphasizes usefulness, originality, accuracy, and reader satisfaction rather than creating material primarily to manipulate rankings.
Google for Developers
For trending subjects, prioritize updates that materially help your audience. Do not change publication dates merely to create an appearance of freshness.
Turn Your First 30-Day Campaign Into a Repeatable Marketing Asset
The first month is largely about building your system.
The second month is about improving it.
After completing the initial campaign, review which topics attracted qualified visitors, which banner formats encouraged clicks, and which offers produced meaningful action.
Retain the templates that performed well. Rewrite unclear headlines. Replace underperforming creative concepts with more useful messages.
Then build the next campaign using what you have learned.
You may also discover ways to repurpose your material.
A detailed blog article can become several educational banners. A customer question can inspire a product tutorial. A new product release can generate a launch sequence, a demonstration, and an FAQ post.
By creating these relationships between your assets, your promotional content becomes part of a connected digital marketing system rather than a collection of unrelated advertisements.
Frequently Asked Questions
1. Can I really schedule 30 days of social media banners in one afternoon?
Yes, it can be achievable when you already have a defined product, brand assets, reusable designs, approved messaging, and properly connected scheduling tools.
For a beginner building everything from scratch, the process may require considerably more time. The key is to create a reusable workflow that becomes faster and easier with each campaign.
2. What is the easiest way to automate digital marketing for a small business?
Start with one or two platforms where your customers are most active. Use reusable banner templates, organize your captions in a content calendar, and select a scheduling tool that supports those networks.
Avoid adding unnecessary automation software before you have a reliable publishing process.
3. Do I need expensive software for promotional banner scheduling?
Not necessarily. Many businesses can begin with basic graphic design tools, spreadsheets, and built-in or entry-level scheduling options.
Costs increase when you need higher publishing limits, additional accounts, advanced analytics, bulk production, or team collaboration. Check current limits before choosing a plan.
4. Will social media automation increase my sales automatically?
No. Scheduling can improve consistency and reduce manual work, but sales depend on factors such as audience relevance, product value, competitive positioning, pricing, trust, and landing-page quality.
Automation helps distribute your marketing messages. It does not guarantee traffic, engagement, conversions, or revenue.
5. How often should I update an automated 30-day marketing campaign?
Monitor publishing errors and customer responses regularly, review performance at least weekly, and conduct a deeper evaluation after each monthly campaign.
Update scheduled content immediately when product availability, prices, promotional conditions, or important business information changes.
Compliance Note: Responsible Digital Marketing Automation
Automated publishing must follow applicable laws, advertising standards, privacy requirements, intellectual property rules, and the policies of the platforms being used.
All promotional claims should be accurate, supportable, and not misleading. Discounts, deadlines, bonuses, and pricing conditions must reflect genuine offers. Avoid fabricated reviews, false scarcity, fake endorsements, and guaranteed income or performance claims.
Use only images, graphics, fonts, templates, and other creative assets that you have permission or appropriate licenses to use commercially. Respect customer privacy and obtain valid consent where required for email marketing, behavioral tracking, and personal data processing.
Affiliate relationships, paid endorsements, and sponsored content should be clearly disclosed whenever applicable. Businesses should also verify the rules relevant to their jurisdiction, including applicable consumer protection and data privacy requirements.
AI-generated copy and designs require human review before publication. Accuracy, accessibility, originality, and ethical marketing practices remain the responsibility of the publisher.
Important: This guide provides educational marketing information, not a guarantee of search rankings, Google Discover placement, follower growth, or sales. Any examples, conversion figures, and workflow timings are illustrative. Results vary according to industry, audience, execution, platform requirements, and market conditions.
Make Your Next 30 Days of Marketing More Organized
Your business does not need an endless supply of new advertisements to maintain a useful digital presence.
It needs a clear understanding of its audience, a consistent message, practical creative assets, and a reliable way to publish them.
By combining reusable design templates, AI-assisted writing, thoughtful promotional banner scheduling, and social media automation, you can transform a scattered daily task into an organized monthly workflow.
Start with five banner templates. Develop 30 audience-focused messages. Schedule them with the appropriate tools. Measure meaningful results and apply what you learn to your next campaign.
Your next step: Choose one product or service today and create its first seven promotional banners. Once the workflow works reliably, expand it into a complete 30-day campaign.
The goal isn’t simply to automate more content. It’s to create more room for the work that actually makes your business valuable: understanding customers, improving your offers, and building relationships that last.
Stay ahead with exclusive updates
Join our community. Get curated industry trends, actionable guides, and fresh resources delivered straight to your inbox.